Pixel Art Techniques: A Practical Guide for Digital Artists
Pixel art has been a staple of video games and digital illustration for decades, and it remains one of the most recognisable visual styles in the industry. Although a finished sprite can look simple, every image is really a collection of carefully placed decisions. This guide sets out the core pixel art techniques that digital artists use to build clean, readable artwork, from the fundamental building blocks to the different approaches you can take to a single piece.
What Makes Pixel Art Different
The first thing that surprises newcomers is the constraint. Pixel artists must convey complex ideas and images using a limited number of pixels, which means simplifying shapes and relying on abstraction techniques to suggest form, texture, and depth. A face might be only a dozen pixels wide, yet it still needs to read clearly to the viewer. That discipline is part of the medium’s charm, but it also means every pixel has a job to do.
Most pixel art rests on four basics: line art, colours, dithering, and shading and anti-aliasing. When starting a piece, make sure that all curves are smooth. Jagged or uneven curves are one of the first signs of an inexperienced artist, so it pays to study how pixels connect before moving on to more advanced techniques.
The Four Core Fundamentals
Before trying any of the more complex pixel art techniques, you should be comfortable with the four fundamentals that support nearly every piece. Each one builds on the others, and skipping any of them will usually show up in the finished image.
Line Art
Line art is the skeleton of a pixel piece. The outline defines the silhouette and the internal shapes, and if the lines are wrong, the whole image suffers. Practise drawing smooth curves at a single-pixel width and learn how to avoid the stepped look that comes from hasty placement. Clean line art gives later stages, such as colour and shading, a solid base to work from.
Colours
Colour is not an afterthought. The first step in many tutorials is choosing a palette, which sets the mood and limits the range you have to work with. A carefully chosen palette keeps an image cohesive and forces you to make deliberate decisions about each pixel. Limited palettes are a feature, not a flaw, because they encourage the abstraction that pixel art relies on.
Dithering
Dithering is one of the most widely used pixel art techniques. It creates the impression of a third colour by alternating two existing colours in a pattern, such as a checkerboard or lines, or by scattering noise. When viewed at normal size, the eye blends the two colours into an intermediate shade. This is especially useful for gradients and textures when your palette does not include a perfect middle colour.
Shading and Anti-Aliasing
Shading adds volume and light to a sprite, telling the viewer where the light source sits and how the form curves. Anti-aliasing works alongside shading by placing intermediate colours along edges, which softens the transition between the outline and the background. Used together, these pixel art techniques stop an image from looking flat while keeping the edges crisp.
A Step-by-Step Workflow for Beginners
A widely shared pixel art tutorial, written by Derek Yu, lays out a clear sequence for building a piece from scratch. The steps are easy to follow and they form a reliable workflow for artists at any level.
- Choose a palette before you start drawing, so you know exactly which colours are available.
- Make a crude outline of the subject. It does not need to be neat at this stage.
- Clean up the outline, refining the curves and making sure every line is intentional.
- Apply the first colours to the main areas of the image.
- Add shading to give the piece volume and depth.
- Use selective outlining to adjust which edges stay dark and which ones blend with the background.
After the sixth step, the tutorial moves on to further refinements, but these six stages are the heart of the process. Following the same order every time helps you build good habits, and it is much easier to fix a problem at the outline stage than after all the colours are in place.
Six Different Approaches to Pixel Art
Artists do not all work the same way. One useful summary of pixel art techniques lists six different approaches, each of which suits a different kind of project. The three approaches described below are the ones named in that summary, and they are a good starting point for finding the method that matches your natural style.
Freehand, Outline First
The outline-first method is the most intuitive approach for many beginners. You start by drawing the outline of the sprite, then fill in the interior with colour and work through shading and detailing. Because the outline is established early, it is easy to see the shape of the final image before you invest time in the details. This method works well for characters and objects with clear silhouettes.
Freehand, Silhouette Method
The silhouette method reverses that order. Instead of starting with an outline, you block in the overall silhouette of the subject first, treating it as a solid shape. Once the silhouette reads clearly, you add the outline, internal details, and shading. This approach is excellent for readability, because it forces you to make the shape recognisable before any detail exists.
Photo-Based Spriting
Photo-based spriting starts from a photograph rather than a blank canvas. You translate the photo into pixel form by reducing the detail and simplifying the shapes until it works at your chosen resolution. This technique is often used for textures and realistic sprites, and it can be a fast way to produce detailed results when freehand drawing is not giving you the look you want.
Resolution and Lines
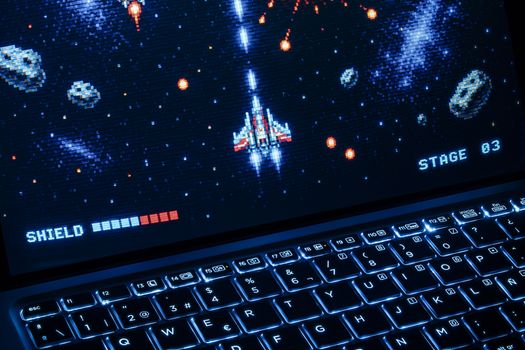
Resolution matters a lot in pixel art, and it is one of the first decisions you should make. At a low resolution, every pixel has to work harder because there are so few of them. At higher resolutions you gain room for detail, but the chunky aesthetic that defines the medium becomes less pronounced. The level of abstraction required changes with each resolution, so experimenting at different sizes is a useful way to understand the craft.
Whatever resolution you choose, smooth lines remain essential. A curve drawn across a grid of pixels needs to be planned carefully so that it does not wobble. Many experienced artists recommend zooming in and out while you work to check that the lines hold up at both scales.
Advice for New Pixel Artists
Early attempts rarely look the way you want them to. One experienced artist, Richard Janes, started out with RPG Maker 95 and could barely manage simple edits to tiny Final Fantasy style sprites. He describes his early pixel art as not working and looking generally awful, despite being told by inexperienced viewers that it was good. His advice, built up over years of practice, is to concentrate on the fundamentals and to keep making pieces.
A beginner perspective from Sandro Maglione makes a similar point: pixel art is about conveying an idea with limited tools, so start small and let the constraints guide you. The wider pixel art community shares dozens of tutorials and resources, and with steady practice you will be drawing dancing potatoes in no time. The important thing is to finish pieces, learn from the rough ones, and study how other artists solve the same problems.
Frequently Asked Questions
What is the best way to learn pixel art techniques?
Start with the four fundamentals: line art, colours, dithering, and shading and anti-aliasing. Work through a structured tutorial that covers the full workflow from palette selection to selective outlining, and practise at a low resolution so you learn to simplify shapes. Complete small pieces regularly and compare your work with artists you admire. The craft improves through repetition, so finishing projects matters more than making every piece perfect.
Why does resolution matter in pixel art?
Resolution controls how many pixels you have to describe a shape or scene. At low resolutions you must rely on abstraction and simplification, because there are not enough pixels for fine detail. At higher resolutions you can add more information, but the chunky retro look becomes softer. Choosing a resolution early in a project is important because it changes every subsequent decision about lines, colours, and shading.
How does dithering create new colours?
Dithering creates the illusion of a third colour by alternating two available colours in a repeating pattern, such as a checkerboard or lines, or by scattering noise. When the image is viewed at its intended size, the eye blends the two colours together into an intermediate shade. This lets artists suggest gradients and extra colours without expanding their palette, which keeps the image cohesive and the process simple.
What should I do if my pixel art looks rough?
Check your curves first. Uneven lines are the most common cause of a rough look, so zoom in and clean up any wobbling edges. Make sure you have completed the outline cleanup stage before adding colour, and avoid placing stray single pixels along borders. Practising smooth curves at a single-pixel width will improve the overall finish of every piece you make.